Tuesday, September 21, 2010

halloween: my plans

I think my love of Halloween stems from my love of candy. I also love to dream up costume ideas, decor ideas, and party ideas.

This is what I am planning for this year:

Costumes-

My eldest will be Pinnochio. He has recently developed a fascination with the character and his story and I am taking full advantage as I love Pinnochio! My baby boy will be Cleo the fish (I know Cleo is a girl, but oh well). And I will be figaro the cat (because being a cat is officially the easiest adult costume out there and I was lucky it fit our 'theme'). I told my husband he could be Geppetto or the Blue Fairy and he opted for neither as he does every year.


I am pretty stoked about how the costumes are turning out. This is what I have so far.

Cleo, the fish:
Photobucket

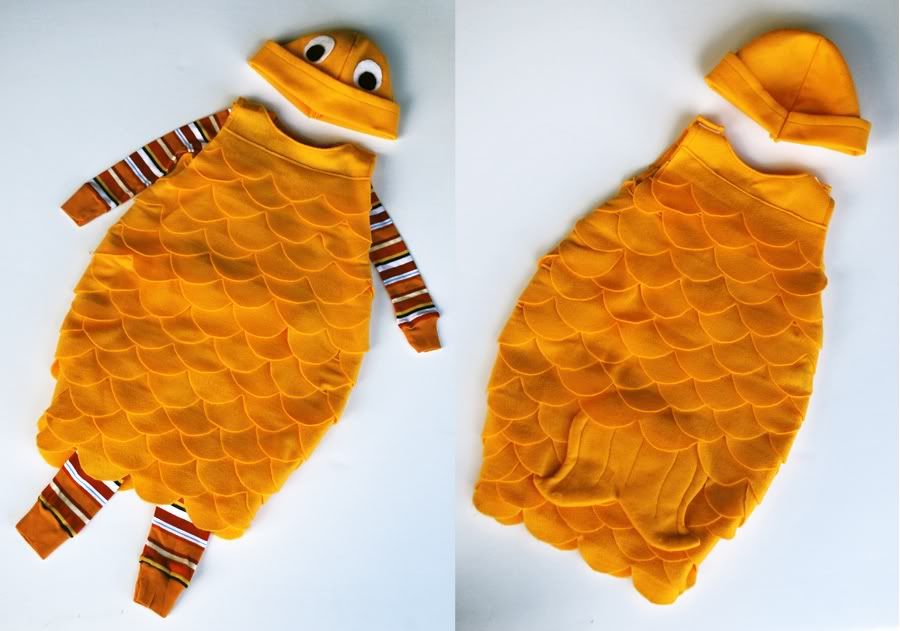
I am so proud of this little costume. It certainly is not perfect, but I love it anyway. I came up with it after researching all the little fish costumes I could find online. My favorite was this one from Martha, but I didn't trust myself to be able to sew those scales so perfectly and I knew my baby was now too mobile to put up with the bunting type costume anymore so I dreamt this little number up:) The best part is it cost me about $5!!!

Pinnochio:
Photobucket

This costume was fairly simple as well. I was lucky to get a yellow polo on clearance, then headed off to my local Joannes to pick up the felt for the hat, the feather, the buttons, and cheap fabric for the shorts and bow. This probably cost me between $10-15. I used a pajama bottom pattern I had for the shorts and just put the elastic in the back. I love making costumes (when they turn out). They are usually cheaper, look better and of better quality than costumes from the store!!

For my Figaro costume I am just going to wear all black and put on some ears, a tail, and a little nose and whiskers via a little face paint.

I will be getting my Halloween decorations out this weekend. I meant to last weekend, but such is life. I am hoping to make this craft with my four year old to add to our decorations this year.

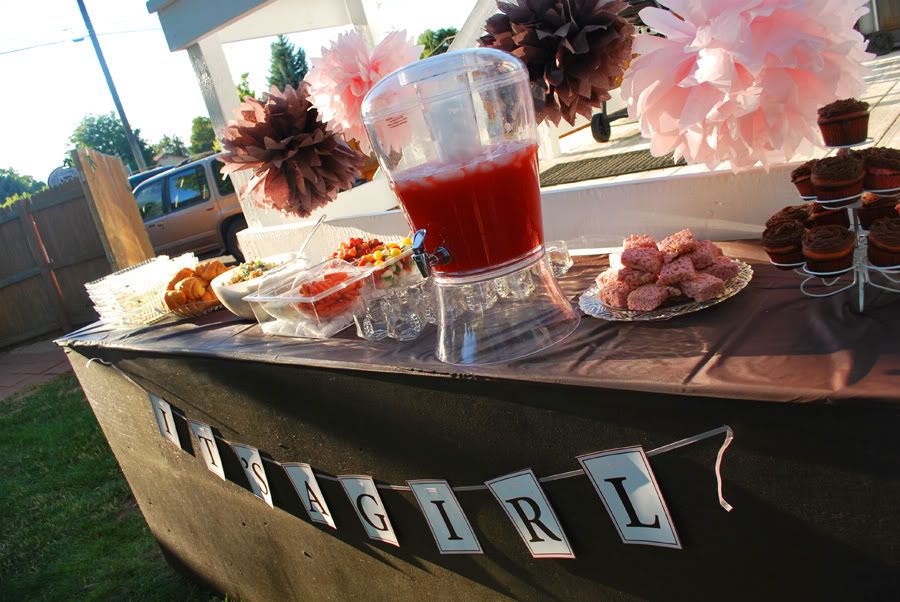
And next week we are planning to have a small party here too. Basically just a yummy dinner and pumpkin carving with a few other families and some decorations. I will share those details on here soon:)

Sunday, September 19, 2010

Photoshop Tips

Photoshop Tips

Disclaimer: In no way am I a photoshop pro. I am just in love with the program and don't know what I would do without it. Once you realize the power that lies within photoshop you will never want to live without it and wish you had time to photoshop all of your photos. Having said that- this is what I do know about this amazing program (which remember, isn't much comparatively with all that photoshop can do, but that is good news for you because it means it will be easy for you to learn :) )

Personally, I like color photos (although I do love sepia tone and black and white too) the best. I like my photos to look close to what the natural eyes sees but better. And I like the colors to *pop*. These are the tools I generally use to try to achieve that. I will try and demonstrate these techniques with this picture.

Photobucket

First I check my levels.
Before:
Photobucket
After:

Photobucket

It's probably hard to tell much of a difference in this picture, but this simple step has saved many pictures I have taken in the past. What you want to do with the levels feature is move the right hand arrow left until it hits the black part of the histogram, the left arrow right, and depending on the photo mess with the middle arrow and see if you want to move it to the left or right. I could go into more detail about what this feature is and what it does exactly, but I am going to keep this tutorial as simple as possible. You can click on this link to learn more.

Then I see what curves can do. I generally use it to make my brights a bit brighter and my darks a bit darker.
Before:
Photobucket
After:
Photobucket
Again, click here to get more in depth info.

Then, depending on the photo and where I want to go with it I play with selective color, or color balance, or photo filters, or hue/saturation, or brightness/contrast. I usually only use one of these tools- it just usually depends on the photo. I used selective color in this photo and probably use it most of all of the previously mentioned photos.

In this photo I just thought all of the darks needed to be darker so I selected black and moved the black slider as far up as it could go and liked the effect.

Before:Photobucket

After:Photobucket


A lot of pictures I take indoors that have a yellow hue to them I will use a cooling photo filter or the color balance feature to try to fix it. As far as hue/saturation goes, I usually only pop the saturation a few notches when I think the colors just need a little pop and don't want to take the time to go into the selective color and manually pop certain colors. Same with the brightness contrast feature- I just see if I can up the contrast a little without compromising the quality of the photo too much if the curves feature hasn't given me enough contrast.

Now for the fine tuning:

For the eyes you can use the burn and dodge tool to brighten them up.
Photobucket
In the above photo I lightened the eyes a little bit to make them pop. Then I decided that I wanted to get rid of some of the skin blemishes on my oldest sons chin and make the darks a little darker using the selective color again and this time moving the slider up on the black in the neutrals palette.

Photobucket

For blemishes or skin discoloration you can also use the stamp tool, the healing brush tool, or you can try to airbrush some color on top of the skin playing with the transparency to keep the photo looking real. There are tons of other great tutorials out there on perfecting skin in photoshop. I use a couple of other methods- but these are the main and basic things I do. Here is the final before and after so you can see how far we've come with these simple steps.

Photobucket

Photobucket


The key with photoshop is to play, play, play and research when you get stuck. There are TONS of great tutorials online (most of them are better than this one too) for anything you are looking to do. This is just my attempt at a tutorial... because I said I would:) Hope it helps!!

Thursday, September 9, 2010

partaaay!!

I know it isn't officially fall yet, but it is sure starting to feel like it around here. The frigid air in the morning, the toasty temps in the afternoon, and all the pitter pattering of the little feet on their way to school every day. My little one officially started preschool this year and is loving it already!

I am looking forward to the leaves changing colors, wearing warm sweaters, going on walks and hearing the leaves crunch underneath my feet, and fall comfort food... mmm mmm. The older I get, the more I like fall. Summer has always had my heart in the past. This summer both crawled and flew by. I started the summer with so many fun plans and ideas. A lot of them got swallowed up by tending to regular household mommy duties unfortunately. Summer went out with a bang for me though with my trip to Oregon to see my family. We partied and partied some more.

I love a good party. I love thinking them up and carrying them out. And I always learn a lot. Here is what I learned from the last two parties I threw.

Horse Birthday Party:
Photobucket
Photobucket1. Never expect things to go exactly as planned. The cake didn't turn out at all how I had envisioned it in my head, but at least it tasted good. And the balloons I insisted on having there flew away after knocking over a few cupcakes and root beers over:( Ah well.
Photobucket
Photobucket
Photobucket2. Plan age appropriate games and keep things loose and fun. We had about 15 kids ranging in ages from 18 months to 9 years old. I decided to go with three simple games: barrel racing, pin the tail on the horse, and a big water fight. It felt like just the right amount of games and everyone had fun I think. The little ones didn't like the water fight so much, but they enjoyed watching the older ones get a little crazy with it.
Photobucket
Photobucket
3. Party favors are so worth the little money they cost. Make sure to plan far enough in advance to be able to order fun things online that go with your theme. There are so many options online. In my bags I included miniature horses, candy, bandanas, fake mustaches, and bandana printed snap bracelets and pencils. The horses were a hit with the little ones and the mustaches, bandanas, and snap bracelets were a hit with everyone.

Baby Shower:
Photobucket
Photobucket
1. Always invite a friend to throw it with you. It is just more fun to have another person to dream up ideas with, carry them out, and review how it went. Plus it is just more pressure and not as fun to do it all on your own. I did the invitations, decorations and dessert. And my buddy did the amazing food.
Photobucket2. Make sure to plan the shower for the mom. Sounds obvious, but I think it is really important to get her involved a little and figure out what she really wants. We had this shower after her baby arrived because she was on bed-rest the last couple of months before she had the baby, we planned it when she had family coming into town, and we didn't have games because she doesn't like them. It was a fun relaxing evening and we are always looking for excuses to have fun girl get togethers:)
Photobucket