
Photoshop Tips
Disclaimer: In no way am I a photoshop pro. I am just in love with the program and don't know what I would do without it. Once you realize the power that lies within photoshop you will never want to live without it and wish you had time to photoshop all of your photos. Having said that- this is what I do know about this amazing program (which remember, isn't much comparatively with all that photoshop can do, but that is good news for you because it means it will be easy for you to learn :) )


Personally, I like color photos (although I do love sepia tone and black and white too) the best. I like my photos to look close to what the natural eyes sees but better. And I like the colors to *pop*. These are the tools I generally use to try to achieve that. I will try and demonstrate these techniques with this picture.

Before:
After:

It's probably hard to tell much of a difference in this picture, but this simple step has saved many pictures I have taken in the past. What you want to do with the levels feature is move the right hand arrow left until it hits the black part of the histogram, the left arrow right, and depending on the photo mess with the middle arrow and see if you want to move it to the left or right. I could go into more detail about what this feature is and what it does exactly, but I am going to keep this tutorial as simple as possible. You can click on this link to learn more.
Then I see what curves can do. I generally use it to make my brights a bit brighter and my darks a bit darker.
Before:
After:
Then, depending on the photo and where I want to go with it I play with selective color, or color balance, or photo filters, or hue/saturation, or brightness/contrast. I usually only use one of these tools- it just usually depends on the photo. I used selective color in this photo and probably use it most of all of the previously mentioned photos.
In this photo I just thought all of the darks needed to be darker so I selected black and moved the black slider as far up as it could go and liked the effect.
Before:
After:
A lot of pictures I take indoors that have a yellow hue to them I will use a cooling photo filter or the color balance feature to try to fix it. As far as hue/saturation goes, I usually only pop the saturation a few notches when I think the colors just need a little pop and don't want to take the time to go into the selective color and manually pop certain colors. Same with the brightness contrast feature- I just see if I can up the contrast a little without compromising the quality of the photo too much if the curves feature hasn't given me enough contrast.
Now for the fine tuning:
For the eyes you can use the burn and dodge tool to brighten them up.
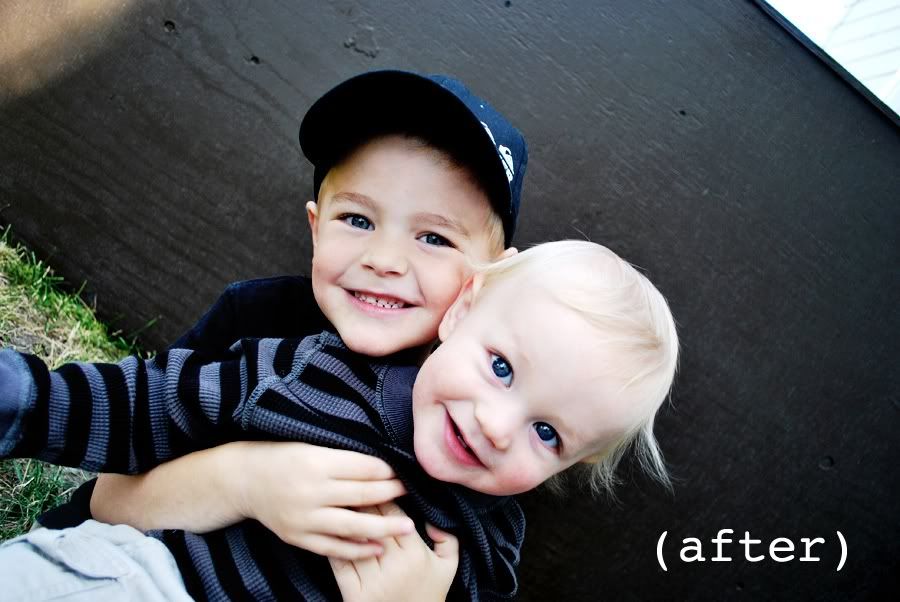
In the above photo I lightened the eyes a little bit to make them pop. Then I decided that I wanted to get rid of some of the skin blemishes on my oldest sons chin and make the darks a little darker using the selective color again and this time moving the slider up on the black in the neutrals palette.

For blemishes or skin discoloration you can also use the stamp tool, the healing brush tool, or you can try to airbrush some color on top of the skin playing with the transparency to keep the photo looking real. There are tons of other great tutorials out there on perfecting skin in photoshop. I use a couple of other methods- but these are the main and basic things I do. Here is the final before and after so you can see how far we've come with these simple steps.
The key with photoshop is to play, play, play and research when you get stuck. There are TONS of great tutorials online (most of them are better than this one too) for anything you are looking to do. This is just my attempt at a tutorial... because I said I would:) Hope it helps!!


1 comment:
Awesome tutorial Kaela. I feel lucky to have had it in person a year or so ago. These few tips you showed me have saved MANY pictures and made all of them just a tad if not TONS better. Thank you so much!
Post a Comment